
Great Bend | ||||||||||||||||||||||||||||||||||||||||||||||||||||||||||||||||||
| ||||||||||||||||||||||||||||||||||||||||||||||||||||||||||||||||||
| ||||||||||||||||||||||||||||||||||||||||||||||||||||||||||||||||||
Great Bend is the thirteenth or fourteenth mission in Fallout Tactics.
Walkthrough
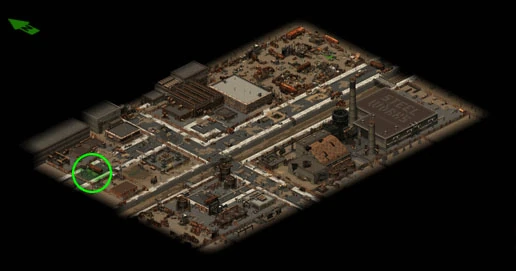
Block One
As soon as you begin you will see Jake, he will merely warn you of the robots ahead. There will be several ranged Humanoid Robots and a few armed with slicing weapons. The ones using melee are actually more of a threat because, like deathclaws, they easily immobilize you and knock away AP points as you try to fight back. Also in the area is some downed power lines, which do quite a bit of damage so try not to get too close. Once the robots are cleared, enter the building in the top left near the gate. Inside is a switch that will open up to block two.
Block Two
There will be several ranged humanoid robots patrolling along the road. Nearby will be two large buildings, inside the first are a couple Loadlifter robots and two Security robots. First deal with the load lifters by luring them out of the building and then either "kiting" them by running, stopping, then shooting (they are slower than you) or using various obstacles like doorways, ladders, and pipes to get them stuck and unable to reach you. Once they are finished off you can deal with the security robots, which are a larger threat. They fire fairly quickly and are extremely accurate, even at a distance. If possible, position yourself so you fight one at a time instead of having several of them shooting you at once. After they are cleared, there are several corpses, a crate, and a locker to collect from. The next building has three more Security bots waiting for you. Letting all of them attack at once will drain your health fast, so try to use the conveyor belts for cover. Also in this building is a staircase leading to a locked (very easy to lockpick) door with a shelf and corpse on the other side to loot. Now that all the machines are cleared from this block, if you want, you can check a small building with "BOS go home" spray painted on the side. It is also locked (again, easy to pick) and inside is Mike, who, as it turns out, hates the Brotherhood and blames them for the death of his sister. Though he isn't of any help, there is an underground tunnel in the building that leads into the lower ditch (though it isn't of much use either). Once you are finished you can move on to the Junkyard at the top corner of the map.
Junkyard
The Junkyard is a maze of pathways full of humanoid robots using various equipment. Almost all of the robots have different weapons, and very little ammunition, making keeping ammunition up difficult. Approach corners slowly to avoid ambushes and the Junkyard will turn out to be one of the easier areas to clear. Once you get to the exit you will see Gloria lying on a bed on the side of the road. She will tell you of some of her exploits as a prostitute and has a few items to barter for. When you are finished talking to her, there is a Bridge on the lower right side leading to the Steel Works factory. On the bridge is a corpse with a P94 plasma rifle and microfusion cells.
Steel Works
After crossing the bridge there is a long narrow path along the backside of the factory. There are several humanoid robots waiting with various weapons. The most annoying of which will be the one with the sniper rifle at the very end who will snipe at you the entire time you move forward. If you can get close enough, there is an oil drum behind him which, if shot, will kill the robot instantly. Now you can enter the actual factory area. The only threat in this area are the almost comically incapable Loadlifter robots. There are several small areas for them to get stuck on, or you can even lead them back to the small doorway at the bridge, but once they are all taken care of you can check the area for supplies, which will include Environmental Armor Mark II. At left side of the area is a tiny building with a pacification robot trapped under rubble from the ceiling collapsing on top of it. It is hostile but can't attack, but still destroy it. There will also be a switch that opens the gate to the next area.
Block Three
This will actually be the area with the least amount of resistance. Just a couple robots, one of them being a load lifter. There is also several explosive hydrogen tanks and a switch to activate a hydraulic press that will crush any robot you can manage to lure through it. Other than that, it is just an anticlimactic end to the mission.
Optional Objective
The secondary objective is to talk to all the survivors.
- Jake is crouched down behind and obstacle at the very start of the mission.
- Noelene is south of the downed power lines nearby.
- Mike is inside the small building with "BOS go home" spray painted on it, at block two.
- Gloria is lying on a bed on the road outside the junkyard.
Hints
- There is very little ammunition throughout the level and the humanoid robots drop less ammunition than it takes to kill them, plus all the loadlifter robots which use up quite a bit of ammunition and drop none. You should bring much more ammunition on this mission than you normally would as it is very possible to actually run out. Since there are so few things to pilfer, leaving the base nearly encumbered in ammunition would actually be a good idea.
Notes
- After either this mission, or the Cold Water mission is completed, you will be able to purchase power armor from the on-base merchant.
Bugs
- Despite the map on the pipboy stating that the insertion point will also be the extraction point, once the mission is complete, the extraction point pops up in multiple places around the map, but not in the spot indicated by the pip-boy.
| ||||||||||||||||||||||||||||||||||||||||||